Dwarf Fortress (2): Welcome to the World
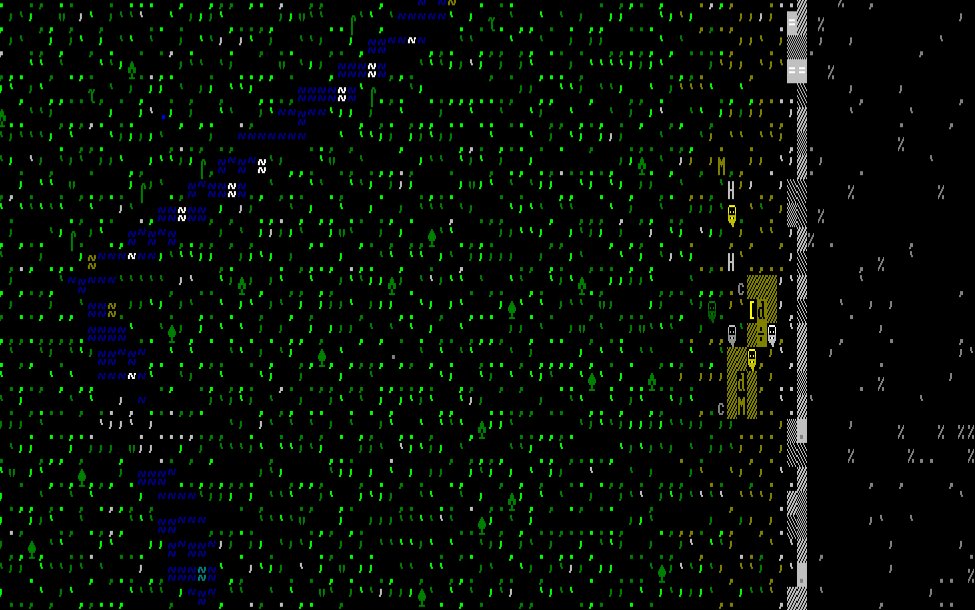 That's a screenshot of my world when I arrived. I'll mention it later.
I’m going to have a little “clean-up” section at the beginning of these posts to note additional general information before going to the play session.
First off, my supply choices were poor. Several people e-mailed to point out that I should have gotten ale as well as selecting cheaper meat, etc. Here’s some good advice from Kent Peterson:
Something I typically do is spread out my initial food purchases over all the 2-point meats, plus some seeds, plus some of each kind of alcohol. Usually that's enough that it takes 3 wagons to carry it all, which gives me 3 horses, which means I have good odds of having one of each sex, which gives me an extra start on breeding them, which means extra meat and leather and bones later on.
Also, since you also get one mule per wagon, that's extra meat and leather and bones as soon as you want it (particularly for the first winter, if need be).
The ale barrels can be re-used after they’re emptied, and you can tear those wagons down for wood. I’m sure I’ll mention this a hundred times in the next couple of weeks, but this game rewards thinking. Kent’s advice is based on the most logical approach to supplies—it’s not a puzzle or some game trick you have to learn.
In most games, I’d just restart, but this game is all about adapting—it’s not a perfect path game by any means. So I’m sticking what I’ve got and I’ll find a way to make it work.
Here’s information you need to know about saves. You get one, and the game will ask you when you quit playing if you want to save or abandon your fortress. In other words, when you leave the game, it's saved for you. Like I said yesterday, that's a good thing, because the fascination and intrigue of this game is that there's no perfect path. And if somehow your dwarves fail to survive, well, their history becomes part of the lore of the world.
And if you fail in one location, there are 49 others. You can play them all, if you want to, and all their history will get woven into the history of the world. Freaking fantastic.
This designer is playing in another league entirely.
All right, let’s get started for today. Start the game and choose the “continue playing” option, which will load your save game. You only get one save per region, and the game saves automatically when you exit (unless you select an option to abandon the region).
Like I said, the game’s about surviving and adapting. If you screw up, you don’t reload an earlier save—you think about what you can do to solve the problem.
So I entered my region and the screenshot is at the top of the post.
Holy crap, that looks awful. It’s gibberish. When you first see the game screen, you’re going to be in shock, but don’t freak out. Let’s talk about what you can do to get oriented. First off, hit the space bar to pause the game. That will give you all the time you want to look around.
The default view consists of three panels: the game world, the command menu, and the world view (the command menu doesn't show up in the game images, though, so you can't see it in the screenshot).
TAB through the views until you see your region map on the left and the command menu on the right. Now press “K” and move the yellow X around the map to get a better idea of what you’re seeing. You’ll notice that the command menu has been replaced by information identifying your current location. So you can look at everything and it will all be identified for you. Do that for a few minutes, and the map will look far less intimidating.
You’ll notice a few things very quickly. Grass is green, because it’s spring. Animals are identified by letters. Dwarves have little faces. If you want to see what it looks like without actually having to start up the game, just click on the screenshot up top.
On the left, you’ll see the outdoors. On the right, you’ll see the mountain. Your dwarves start right next to mountain, and you can see their wagons, supplies, and animals beside them. And there’s a huge command window on the right side of the screen.
Let’s look at the items in the command menu:
A-view announcements (a reviewable history of all event messages)
B-build (place a building)
C-civilizations (view info about each civilization you’ve discovered)
D-designate (designate areas for gathering resources)
U-units (similar to the job menu, but focusing on personnel)
J-job list (shows you all active jobs and who, if anyone, is doing them)
K-look around
G-gate (centers the game view on the main gate of your fortress)
M-military (activate units, assign to squads, assign weapons)
X-command squad (set patrol orders
O-orders (set general orders for all dwarves)
P-stockpiles (designate storage areas for different types of materials)
Q-create building tasks (add activities for craftsmen to perform). Sometimes you can also set the properties of objects here.
R-rooms (view lists of rooms and building)
T-view items (view objects inside a building)
V-view (view unit skills and personal information. Can also assign skills and preferences here)
Z-overall status (population and food supply, most importantly)
L-legends (this shows up after you discover one of the many legends, I believe)
N-nobles (when nobles show up this menu item will be added)
Space Bar-pause
Like everything else, it looks a bit overwhelming, particularly since many of those commands have extensive sub-menus. At its core, though, all these menus really only involve a few higher-level concepts, like obtaining information or assigning jobs or designating storage areas. At the basic level, it’s not really more complicated than that.
So you’ve got this vast expanse of confusing (at first) ASCII in front of you, and a large menu with a large learning curve.
What do you do now?

<< Home